The latest video series has been looking at creating forms, we now extend those forms to run PHP code, firstly to create openLDAP users then to delete users.
LDAP PHP Module
Fist we have to make sure that the PHP module for ldap is installed. On my SUSE 11 system this would be achieved with the command :
zypper in php53-ldap
The following graphic using the zypper search facility we can confirm that the module is installed:
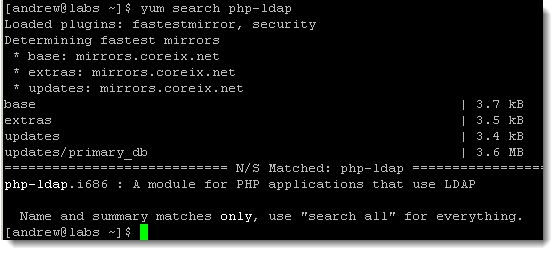
Similarly on CentOS you could use yum:
We will use two web pages for each operation :
- ldapuseradd.html
- ldapuseradd.php
- ldapuserdel.html
- ldapuserdel.php
ldapadduser.html
The ldapuseradd.html has been the webpage that we have been working with, so little changes are required for this, just adding in the form action to pas data through the the PHP file:
<html>
<head>
<link rel = "stylesheet" type = "text/css" href = "stylesheets/stylesheet.css">
<title>Add ldap user</title>
<body>
<h1>Add User</h1>
<hr>
<form action = "ldapuseradd.php" method = "post">
<p>
<label for="username">Username:</label> <input type="text" class="input" id="username" name="username">
<br><label for = "firstname">First Name:</label> <input class = "input" type ="text" id = "firstname" name="firstname" >
<br><label for="lastname">Last Name:</label> <input class="input" type ="text" id = "lastname" name="lastname">
<br><label> </label><input type="submit" value="submit" class="button">
</p>
</form>
</body>
</head>
</html>
ldapadduser.php
Connecting to the LDAP directory and creating the user is down to the ldapuseradd.php, accepting values passed through from the originating form:
<html>
<head>
<link rel = "stylesheet" type = "text/css" href = "stylesheets/stylesheet.css">
<title>TheUrbanPenguin PHP LDAP Add</title>
</head?
<body>
<h1> Adding LDAP User</h1>
<hr>
<?php
$cn = htmlspecialchars($_POST['username']);
$givenName = htmlspecialchars($_POST['firstname']);
$surname = htmlspecialchars($_POST['lastname']);
echo "Adding user: $cn " . '<br>';
$ds = ldap_connect("localhost") or die ("Could not connect to LDAP Server");
if ($ds) {
$r = ldap_bind($ds,"cn=admin,dc=tup,dc=com","Password1");
$info["cn"] = $cn;
$info["givenName"] = $givenName;
$info["surname"] = $surname;
$info["objectClass"] = "inetOrgPerson";
$r = ldap_add($ds,"cn=$cn,ou=Users,dc=tup,dc=com",$info);
$sr = ldap_search($ds,"dc=tup,dc=com","cn=$cn");
$info = ldap_get_entries($ds,$sr);
echo "The user:<span class='result'> " . $info[0]["dn"] . "</span> has been created. <br>";
}
ldap_close($ds);
?>
<hr>
<a href = "ldapuseradd.html">Add another user</a>
</body>
</html>
The main highlights:
- <?php : The start of the php code
- htmlspecialchars() : This function strips the unnecessary charcters that are passed through from the fields in the form
- ldap_connect(“localhost”) : Connecting to the ldap server in our case the same machine as the web server
- ldap_bind($ds,”cn=admin,dc=tup,dc=com”,”Password1″) : logging as the ldap admin user. The PHP code is not sent to the browserver but you would want to ideally keep this PHP file from being in the document_root of the webserver to protect the password.
- $info : This array is used to house the properties of the user we wish the create
- ldap_add : This, as the name suggests, creates the ldap user, we use the connection $ds, the full distinguished name of the user we are cretaing and then the array containing the user properties
- ldap_search : We use this to return the user we just created so it can be displayed to the admin user
- ldap_close : disconnect from the LDAP server
- At the base of the page we provide and anchor link to allow the creation of more users
CSS
The css file we have been using has been added to cater for the result class we use in the span tag. This allows for the displaying of the user we have created to be highlighted as shown in the following code from the PHP file:
echo "The user:<span class='result'> " . $info[0]["dn"] . "</span> has been created. <br>";
This will display in the web page similar to this:

The associated CSS code for this is simple:
.result {
 color: Red;
 font-weight: bold;
}
The final CSS adjustment is to set the hover or mouse-over color for the anchor at the bottom of the page:
a:hover {
 color: #f00;
}
Similarly we do create the ldapuserdel.html and php file
ldapuserdel.html
<html> <head> <link rel = "stylesheet" type = "text/css" href = "stylesheets/stylesheet.css"> <title>Delete ldap user</title> <body> <h1>Delete User</h1> <hr> <form action = "ldapuserdel.php" method = "post"> <p> <label for="username">Username:</label> <input type="text" class="input" id="username" name="username"> <br><label> </label><input type="submit" value="submit" class="button"> </p> </form> </body> </head> </html>
ldapuserdel.php
<html>
<head>
<link rel = "stylesheet" type = "text/css" href = "stylesheets/stylesheet.css">
<title>TheUrbanPenguin PHP LDAP</title>
</head>
<body>
<h1> Deleting LDAP User</h1>
<hr>
<?php
$cn = htmlspecialchars($_POST['username']);
echo "Deleting user: $cn " . '<br>';
$ds = ldap_connect("localhost") or die ("Could not connect to LDAP Server");
if ($ds) {
$r = ldap_bind($ds,"cn=admin,dc=tup,dc=com","Password1");
$sr = ldap_search($ds,"dc=tup,dc=com","cn=$cn");
$info = ldap_get_entries($ds,$sr);
$dn = $info[0]["dn"];
ldap_delete($ds,$dn);
}
ldap_close($ds);
?>
<hr>
<a href = "ldapuserdel.html">Delete another user</a>
</body>
</html>


