The two big players in the free JAVA IDE field are NetBeans and Eclipse. jDeveloper is also out there but it seems that the former are both well used. I have been a big user of Eclipse but have recently started using NetBeans. I my opinion NetBeans has the edge of Eclipse on two areas that I have noticed. Firstly it comes with a GUI designer so no need to download additional plugins, the GUI designer is great in that it offers easy alignment of components added to form; secondly it provides JDBC or Oracle, PostgreSQL and MySQL drivers out-of-the-box and goes beyond that int hat a connect manager is provided to manage your SQL server.
Download and Install NetBeans
You can download the latest version of NetBeans for you OS from NetBeans.org. For Ubuntu the shell script that was downloaded was netbeans-7.4-javase-linux.sh, the installer comes bundled with the Java SDK of your choice, I choose Java SE. This will download as a new file and will need to execute permission adding. Move to your downloads directory and add the execute bit
chmod +x netbeans-7.4-javase-linux.sh
With this set we can now commence the install running with sudo to gain rights:
sudo ./netbeans-7.4-javase-linux.sh
The installer will extract the files and start a GUI wizard for the install. This is simple and takes little time. Once installed you can access the NetBeans program from the Ubuntu Dash Home icon, just begin typing NetBeans to to start your search.
Using NetBeans
On starting NetBeans you can create a New Project from the men or button panel. Choosing a Java Application project will create the project, package and class file. So if we create anew project called JAVA. We will have the following structures created:
JAVA > Project
java > package
Java.class > Class file with main method
Once we have code on the class file we can compile and execute from the menu or using F6. If we have added additional class files and wish to run those class files then we can select the file and use SHIFT + F6 or right click on the file in the navigator and choose Run File.
The SWING designer is included and we can create JFrame classes or create forms.
Databases
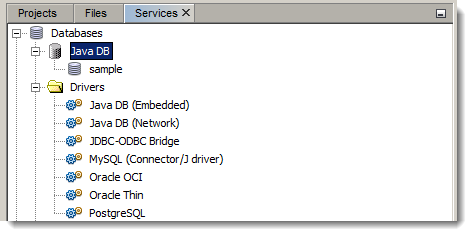
Another big plus for me is the inclusion of the JDBC drivers. From the Services tab near the top left you can expand the Databases tab and see the registered drivers. You can also make connections to your own Database servers from here and crate databases and tables easily through the interface or SQL designer.
The final point to note is that if you have been using Eclipse you can import your projects from Eclipse into NetBeans 🙂

