Solaris 11 introduces the IPS or Image Packaging System. This provides a simple way to install, update and manage software across your Solaris 11 platforms. The installation of Solaris will normally provide you with the internet based repositories based in Oracle. Where you have many servers it does make sense to have your own local repository from where software updates can be delivered rather than each host accessing the internet. In this tutorial we look at setting up such a local repository and access the repo both locally from the repo host and remotely for other Solaris 11 Hosts.
Download the ISO Files
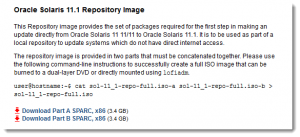
Of course to start this we have to download the repository data. One of the most convenient way is via ISO files on the oracle download site. On the main download page for Solaris : http://www.oracle.com/technetwork/server-storage/solaris11/downloads/index.html They are supplied separately for SPARC and Intel servers and as two ISO files for each platform. These need to be downloaded and merged into a single ISO file.

Merge the ISOs
Once downloaded, each file will be 3.8 GB or so, and we can us the cat command to merge them into a single file. Of course, this will mean that we will need double the disk space, so lets say 4 GB for each ISO and 8 for the final target ; 16GB .
# cat sol-11_1-repo-full-iso.a sol-11_1-repo-full-iso.b
 > sol-11-1-repo.full.iso
Mount the ISO
We will now mount to ISO file so we can copy the contents to a permanent location, generally using the /mnt directory is a good target for a temporary mount
# mount -F hsfs /iso/sol-11-1-repo.full.iso /mnt
Create the ZFS Dataset
It is worth while creating a ZFS data set to represent the repository data as we can set properties such as not to maintain the last access time and even compression if you feel it is needed. As we will look after just one repo then a top level directory with the name will be the way we approach this.
# zfs create -o mountpoint /repo -o atime=off rpool/repo
We then simply copy the contents of the /mnt/repo directory through to the repo directory we just created. Make note of the trailing / indication we copy the contents of /mnt/repo/ ; without it we would copy the contents and the directory to the target.
# rsync -aP /mnt/repo/ /repo
Configure the Packaging Server
Oracle and Solaris do like to make life easy for the administrator, the packaging server ships with the product so we do not need to install and additional web server; we just need to configure it. If we were only to need local file access to this for the one machine then there is nothing to configure:
Set the web root for the repository
# svccfg -s application/pkg/server setprop pkg/inst_root=/repo
Set to read only
 # svccfg -s application/pkg/server setprop pkg/readonly=true
Double check by reading back the properties and view the default port
 # svcprop -p pkg/inst_root application/pkg/server
 # svcprop -p pkg/readonly application/pkg/server
 # svcprop -p pkg/port application/pkg/server
Have the service refresh its configuration
 # svcadm refresh application/pkg/server
Start the service and set for auto-start
 # svcadm enable application/pkg/server
Display the service status
 # svcs application/pkg/server
Setup local access
If we need access only for this one machine, perhaps as it will not have access to the internet then there is no need for the packaging server as the host itself can access the file system locally. First we refresh the repository data. Then we delete current publishers with the -G option and add the new one with the alias of solaris using the -g option. Big difference between the upper case and lower case g. The command pkg publisher will just display the current repository settings.
# pkgrepo -s /repo refresh
 # pkg set-publisher -G ‘*’ -g file:///repo solaris
 # pkg publisher
Enable remote clients
For other Solaris 11 clients we do something very similar but access the repository via HTTP. The root of the server was set to the /repo directory so no addional URI is required at the end of the server name or IP Address on our example
# pkg set-publisher -G ‘*’ -g http://192.168.0.100 solaris
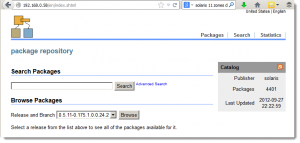
Access to the repository can always be tested via a browser, pointing to the same URL

Summary
We have seen in this example how quickly it is possible to have a local IPS repository up and running to service software requests for Solaris 11.
